In Oracle 10g R2,we can use RMAN to check the corruptions in the database/datafiles or in archivelogs.
$) rman target / nocatalog
RMAN> backup validata database;
RMAN> backup validate datafile 4;
RMAN> backup validate archivelog all;
By default RMAN only checks for physical corruption not for logical corruptions. In order to make the rman to even check for logical corruptions we can go with check option in the backup validate command.
RMAN> backup validate check logical database;
RMAN> backup validate check logical datafile 4;
RMAN> backup validate check logical archivelog all;
Now after performing the above operations, if there are any corruptions in the database you can query the V$DATABASE_BLOCK_CORRUPTION view to find for any corruptions in database.
After taking the RMAN backup of you database, if you want to check the integrity of the backupsets you can use VALIDATE command
RMAN> VALIDATE BACKUPSET 51;
If you want to check whether the database can be restored using the available RMAN backups you can use restore with validate command
RMAN> RESTORE DATABASE VALIDATE;
If you want to check whether a tablespace can be restored using existing backups then use
RMAN> restore tablespace users validate;
If some of your backupsets are missing then below are the messages that RMAN throws while validating
channel ORA_DISK_1: starting validation of datafile backupset
channel ORA_DISK_1: reading from backup piece /u01/app/oracle/rman/full17ldiqjb_1_1
channel ORA_DISK_1: restored backup piece 1
piece handle=/u01/app/oracle/rman/full17ldiqjb_1_1 tag=TAG20100513T120706
channel ORA_DISK_1: validation complete, elapsed time: 00:00:26
channel ORA_DISK_1: starting validation of datafile backupset
channel ORA_DISK_1: reading from backup piece /u01/app/oracle/rman/full16ldiqjb_1_1
ORA-19870: error reading backup piece /u01/app/oracle/rman/full16ldiqjb_1_1
ORA-19505: failed to identify file "/u01/app/oracle/rman/full16ldiqjb_1_1"
ORA-27037: unable to obtain file status
Linux Error: 2: No such file or directory
Additional information: 3
failover to previous backup
data file 1 will be created automatically during restore operation
data file 2 will be created automatically during restore operation
data file 4 will be created automatically during restore operation
Finished restore at 11-AUG-10
Wednesday, August 11, 2010
Thursday, June 3, 2010
How to recreate DUAL table in Oracle after deleting it.
Incase you have dropped the dual table from sys user then there are few steps involved in recreating the DUAL object.
SQL> conn /as sysdba
SQL> drop table dual;
Table dropped.
SQL> desc dba_objects
Name Null? Type
----------------------------------------- -------- ----------------------------
OWNER VARCHAR2(30)
OBJECT_NAME VARCHAR2(128)
SUBOBJECT_NAME VARCHAR2(30)
OBJECT_ID NUMBER
DATA_OBJECT_ID NUMBER
OBJECT_TYPE VARCHAR2(19)
CREATED DATE
LAST_DDL_TIME DATE
TIMESTAMP VARCHAR2(19)
STATUS VARCHAR2(7)
TEMPORARY VARCHAR2(1)
GENERATED VARCHAR2(1)
SECONDARY VARCHAR2(1)
SQL> select sysdate from dual;
select sysdate from dual
*
ERROR at line 1:
ORA-01775: looping chain of synonyms
Check the alertlog file
Errors in file /oraeng/app/oracle/admin/mydb2/bdump/mydb2_j000_26455.trc:
ORA-12012: error on auto execute of job 21
ORA-01775: looping chain of synonyms
Fri May 28 00:39:03 2010
Errors in file /oraeng/app/oracle/admin/mydb2/bdump/mydb2_j000_26455.trc:
ORA-00604: error occurred at recursive SQL level 1
ORA-01775: looping chain of synonyms
ORA-12012: error on auto execute of job 21
ORA-01775: looping chain of synonyms
conn u1/u1
SQL>purge recyclebin;
purge recyclebin
*
ERROR at line 1:
ORA-00604: error occurred at recursive SQL level 2
ORA-01775: looping chain of synonyms
Check the Alert logfile
Errors in file /oraeng/app/oracle/admin/mydb2/bdump/mydb2_j000_26505.trc:
ORA-00604: error occurred at recursive SQL level 1
ORA-01775: looping chain of synonyms
ORA-12012: error on auto execute of job 21
ORA-01775: looping chain of synonyms
Fri May 28 00:40:26 2010
ORA-4063 encountered when generating server alert SMG-3503
SQL> shut immediate; went well
SQL> startup;
ORACLE instance started.
Total System Global Area 167772160 bytes
Fixed Size 1266392 bytes
Variable Size 113249576 bytes
Database Buffers 50331648 bytes
Redo Buffers 2924544 bytes
Database mounted.
ORA-01092: ORACLE instance terminated. Disconnection forced
Checking the alert logfile
Errors in file /oraeng/app/oracle/admin/mydb2/udump/mydb2_ora_26538.trc:
ORA-01775: looping chain of synonyms
Error 1775 happened during db open, shutting down database
USER: terminating instance due to error 1775
Instance terminated by USER, pid = 26538
ORA-1092 signalled during: ALTER DATABASE OPEN...
Create a pfile from spfile and add the below line in the pfile
replication_dependency_tracking= false
Now start the database using pfile;
SQL> startup pfile='/oraeng/app/oracle/product/dbs/initmydb2.ora';
---went fine but create statement failed......
SQL> CREATE TABLE "SYS"."DUAL" ( "DUMMY" VARCHAR2(1)) PCTFREE 10 PCTUSED 4;
CREATE TABLE "SYS"."DUAL" ( "DUMMY" VARCHAR2(1)) PCTFREE 10 PCTUSED 4
*
ERROR at line 1:
ORA-00604: error occurred at recursive SQL level 1
ORA-01775: looping chain of synonyms
Alertlog file
Fri May 28 00:43:23 2010
Errors in file /oraeng/app/oracle/admin/mydb2/bdump/mydb2_j000_26583.trc:
ORA-12012: error on auto execute of job 21
ORA-01775: looping chain of synonyms
SQL> shut immediate
Now open the database using upgrade mode
SQL> startup upgrade pfile='/oraeng/app/oracle/product/10.2.0/dbs/initmydb2.ora';
ORACLE instance started.
Total System Global Area 167772160 bytes
Fixed Size 1266392 bytes
Variable Size 113249576 bytes
Database Buffers 50331648 bytes
Redo Buffers 2924544 bytes
Database mounted.
Database opened.
SQL>
SQL> CREATE TABLE "SYS"."DUAL" ( "DUMMY" VARCHAR2(1)) PCTFREE 10 PCTUSED 4;
Table created.
SQL> Insert Into Dual Values ('X');
1 row created.
SQL> commit;
Commit complete.
SQL> Grant Select On Dual To Public;
Grant succeeded.
SQL> column OWNER format a15;
SQL> column OBJECT_NAME format a20;
SQL> select OWNER,OBJECT_NAME,OBJECT_TYPE,CREATED from dba_objects where object_name='DUAL';
OWNER OBJECT_NAME OBJECT_TYPE CREATED
--------------- -------------------- ------------------- ---------
SYS DUAL TABLE 28-MAY-10
PUBLIC DUAL SYNONYM 30-JUN-05
SQL>
Now dual table is recreated.
Quite interesting............:)
Monday, May 24, 2010
Script to generate DDL of all tablespaces in your database
By running this script you can get the DDL of all tablespaces created in your database.
set verify off;
set termout off;
set feedback off;
set pagesize 0;
set termout on;
select 'Creating tablespace build script...' from dual;
set termout off;
create table ts_temp (lineno number, ts_name varchar2(30),
text varchar2(800));
DECLARE
CURSOR ts_cursor IS select tablespace_name,
initial_extent,
next_extent,
min_extents,
max_extents,
pct_increase,
status
from sys.dba_tablespaces
where tablespace_name != 'SYSTEM'
and status != 'INVALID'
order by tablespace_name;
CURSOR df_cursor (c_ts VARCHAR2) IS select file_name,
bytes
from sys.dba_data_files
where tablespace_name = c_ts
and tablespace_name != 'SYSTEM'
order by file_name;
lv_tablespace_name sys.dba_tablespaces.tablespace_name%TYPE;
lv_initial_extent sys.dba_tablespaces.initial_extent%TYPE;
lv_next_extent sys.dba_tablespaces.next_extent%TYPE;
lv_min_extents sys.dba_tablespaces.min_extents%TYPE;
lv_max_extents sys.dba_tablespaces.max_extents%TYPE;
lv_pct_increase sys.dba_tablespaces.pct_increase%TYPE;
lv_status sys.dba_tablespaces.status%TYPE;
lv_file_name sys.dba_data_files.file_name%TYPE;
lv_bytes sys.dba_data_files.bytes%TYPE;
lv_first_rec BOOLEAN;
lv_string VARCHAR2(800);
lv_lineno number := 0;
procedure write_out(p_line INTEGER, p_name VARCHAR2,
p_string VARCHAR2) is
begin
insert into ts_temp (lineno, ts_name, text) values
(p_line, p_name, p_string);
end;
BEGIN
OPEN ts_cursor;
LOOP
FETCH ts_cursor INTO lv_tablespace_name,
lv_initial_extent,
lv_next_extent,
lv_min_extents,
lv_max_extents,
lv_pct_increase,
lv_status;
EXIT WHEN ts_cursor%NOTFOUND;
lv_lineno := 1;
lv_string := ('CREATE TABLESPACE '||lower(lv_tablespace_name));
lv_first_rec := TRUE;
write_out(lv_lineno, lv_tablespace_name, lv_string);
OPEN df_cursor(lv_tablespace_name);
LOOP
FETCH df_cursor INTO lv_file_name,
lv_bytes;
EXIT WHEN df_cursor%NOTFOUND;
if (lv_first_rec) then
lv_first_rec := FALSE;
lv_string := 'DATAFILE ';
else
lv_string := lv_string || ',';
end if;
lv_string:=lv_string||''''||lv_file_name||''''||
' SIZE '||to_char(lv_bytes) || ' REUSE';
END LOOP;
CLOSE df_cursor;
lv_lineno := lv_lineno + 1;
write_out(lv_lineno, lv_tablespace_name, lv_string);
lv_lineno := lv_lineno + 1;
lv_string := (' DEFAULT STORAGE (INITIAL ' ||
to_char(lv_initial_extent) ||
' NEXT ' || lv_next_extent);
write_out(lv_lineno, lv_tablespace_name, lv_string);
lv_lineno := lv_lineno + 1;
lv_string := (' MINEXTENTS ' ||
lv_min_extents ||
' MAXEXTENTS ' || lv_max_extents);
write_out(lv_lineno, lv_tablespace_name, lv_string);
lv_lineno := lv_lineno + 1;
lv_string := (' PCTINCREASE ' ||
lv_pct_increase || ')');
write_out(lv_lineno, lv_tablespace_name, lv_string);
lv_string := (' '||lv_status);
write_out(lv_lineno, lv_tablespace_name, lv_string);
lv_lineno := lv_lineno + 1;
lv_string:='/';
write_out(lv_lineno, lv_tablespace_name, lv_string);
lv_lineno := lv_lineno + 1;
lv_string:=' ';
write_out(lv_lineno, lv_tablespace_name, lv_string);
END LOOP;
CLOSE ts_cursor;
END;
/
spool create_tablespaces.sql
set heading off
set recsep off
col text format a80 word_wrap
select text
from ts_temp
order by ts_name, lineno;
spool off;
Source: Metalink
Thursday, April 29, 2010
Oracle Data Guard Setup for RAC Database
Click on the link below to get the steps on how to create a single instance physical standby database for a RAC database.
https://docs.google.com/fileview?id=0B2XF1s0skN5qOTY4YzY0NTMtNjI4Ny00OTg0LWIwNGYtZTMyMDBkYjZhNGE1&hl=en
Try it....
https://docs.google.com/fileview?id=0B2XF1s0skN5qOTY4YzY0NTMtNjI4Ny00OTg0LWIwNGYtZTMyMDBkYjZhNGE1&hl=en
Try it....
Thursday, March 25, 2010
Dropping a disk from an ASM disk group in Oracle.............. a typical mistake
Dropping a disk from diskgroup is simple but you need to use disk name rather than disk path while dropping.
Checking the diskgroups present
[oracle@11grac1 ~]$ sqlplus / as sysasm
SQL*Plus: Release 11.2.0.1.0 Production on Thu Mar 25 10:44:12 2010
Copyright (c) 1982, 2009, Oracle. All rights reserved.
Connected to:
Oracle Database 11g Enterprise Edition Release 11.2.0.1.0 - Production
With the Real Application Clusters and Automatic Storage Management options
SQL> select name,type,group_number from v$asm_diskgroup;
NAME TYPE GROUP_NUMBER
---------- ------------------ ------------------
DATA EXTERN 1
DG1 EXTERN 2
Checking the disks in the diskgroup
SQL> col path for a30;
SQL> select name,path,group_number from v$asm_disk order by 3;
NAME PATH GROUP_NUMBER
---------- ------------------ ------------------------- ------------
/dev/sdh1 0
DATA_0002 /dev/sdd1 1
DATA_0000 /dev/sdb1 1
DATA_0001 /dev/sdc1 1
DG1_0002 /dev/sdg1 2
DG1_0001 /dev/sdf1 2
DG1_0000 /dev/sde1 2
Now dropping the disk /dev/sdd1 from diskgroup DATA
SQL> alter diskgroup data drop disk '/dev/sdd1';
alter diskgroup data drop disk '/dev/sdd1'
*
ERROR at line 1:
ORA-15032: not all alterations performed
ORA-15054: disk "/DEV/SDD1" does not exist in diskgroup "DATA"
Correct Syntax is
SQL> alter diskgroup data drop disk DATA_0002;
Diskgroup altered.
Hence while dropping you must use the disk name not the disk path.
Wednesday, March 24, 2010
Recovering a deleted/corrupted OCR disk without having any backup in Oracle 10g RAC
Demonstrating how to recover a corrupted OCR disk when all the OCR backups are lost/deleted.
Using Oracle 10g R2 RAC 10.2.0.1 on RHEL AS4
1) Verifying all service are up and running
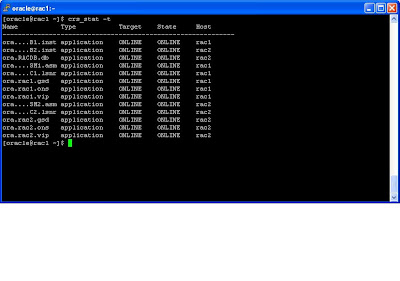 2) Cheking the location of the OCR disks.

3)Simulating the disk failure

4) Go to the $CRS_HOME/install directory as root user and run rootdelete.sh script on both the nodes
one after another


eth0 172.25.0.0 -------------For Public Interface
eth1 172.25.0.0-------------For Private Interface
[oracle@rac1 dbs]$ oifcfg setif -global eth0/172.25.0.0:public
[oracle@rac1 dbs]$ oifcfg setif -global eth1/172.25.0.0:cluster_interconnect
After Configuring Network Interface
[oracle@rac2 ~]$ oifcfg getif
eth0 172.25.0.0 global public
eth1 172.25.0.0 global cluster_interconnect
9) Add TNS Listener information to OCR using netca. Reconfigure your listener using netca
10) Add all the services (ASM,INSTANCE,DATABASE) to OCR using srvctl command
[oracle@rac1 ~]$ srvctl add asm -n rac1 -i +ASM1 -o /u01/app/oracle/product/10.2.0/db_1
[oracle@rac1 ~]$ srvctl add asm -n rac2 -i +ASM2 -o /u01/app/oracle/product/10.2.0/db_1
[oracle@rac1 ~]$ srvctl add database -d RACDB -o /u01/app/oracle/product/10.2.0/db_1
[oracle@rac1 ~]$ srvctl add instance -d RACDB -i RACDB1 -n rac1
[oracle@rac1 ~]$ srvctl add instance -d RACDB -i RACDB2 -n rac2
[oracle@rac1 ~]$ srvctl start asm -n rac1
[oracle@rac1 ~]$ srvctl start asm -n rac2
[oracle@rac1 ~]$srvctl start database -d RACDB
Add any other service if you have any.
Using Oracle 10g R2 RAC 10.2.0.1 on RHEL AS4
1) Verifying all service are up and running

one after another

5) Go to $CRS_HOME/install directory as root user and run rootdeinstall.sh script from the node where you have started your cluster installation here i am using rac1 node. It has to be executed on one node only.

6) Go to $CRS_HOME directory as root user and run root.sh script on both nodes one at a time.

After running root.sh on both the nodes run vipca from second node as root user . After doing that your OCR is recovered. .
7) Configure the Server Side ONS using racgons
Syntax: $CRS_home/bin/racgons add_config hostname1:port hostname2:port
[oracle@rac1 dbs]$ racgons add_config rac1:6200 rac2:6200
8) Configure Network Interfaces for Clusterware
If we wont configure netwok interfaces then Oracle Interface COnfiguration will not list the public and private interconnect information
Before Configuring Network Interface
[oracle@rac1 dbs]$ oifcfg getif --------will display no output
Now configure the network Interface
[oracle@rac1 dbs]$ oifcfg iflist
eth0 172.25.0.0 -------------For Public Interface
eth1 172.25.0.0-------------For Private Interface
[oracle@rac1 dbs]$ oifcfg setif -global eth0/172.25.0.0:public
[oracle@rac1 dbs]$ oifcfg setif -global eth1/172.25.0.0:cluster_interconnect
After Configuring Network Interface
[oracle@rac2 ~]$ oifcfg getif
eth0 172.25.0.0 global public
eth1 172.25.0.0 global cluster_interconnect
9) Add TNS Listener information to OCR using netca. Reconfigure your listener using netca
10) Add all the services (ASM,INSTANCE,DATABASE) to OCR using srvctl command
[oracle@rac1 ~]$ srvctl add asm -n rac1 -i +ASM1 -o /u01/app/oracle/product/10.2.0/db_1
[oracle@rac1 ~]$ srvctl add asm -n rac2 -i +ASM2 -o /u01/app/oracle/product/10.2.0/db_1
[oracle@rac1 ~]$ srvctl add database -d RACDB -o /u01/app/oracle/product/10.2.0/db_1
[oracle@rac1 ~]$ srvctl add instance -d RACDB -i RACDB1 -n rac1
[oracle@rac1 ~]$ srvctl add instance -d RACDB -i RACDB2 -n rac2
[oracle@rac1 ~]$ srvctl start asm -n rac1
[oracle@rac1 ~]$ srvctl start asm -n rac2
[oracle@rac1 ~]$srvctl start database -d RACDB
Add any other service if you have any.
Monday, March 15, 2010
Copying/Moving a datafile from one diskgroup to another diskgroup
Steps involved in moving/copying a datafile from one diskgroup to another diskgroup
1) Use rman to copy the datafile to another diskgroup.
2) Offline the datafile
3) Switch the datafile to the copy
4) Recover the datafile
5) Online the datafile
RMAN> report schema;
Report of database schema
List of Permanent Datafiles
===========================
File Size(MB) Tablespace RB segs Datafile Name
---- -------- -------------------- ------- ------------------------
1 480 SYSTEM *** +DG1/racdb/datafile/system.261.713375891
2 200 UNDOTBS1 *** +DG1/racdb/datafile/undotbs1.516.713375845
3 620 SYSAUX *** +DG1/racdb/datafile/sysaux.517.713375779
4 200 UNDOTBS2 *** +DG1/racdb/datafile/undotbs2.515.713375845
5 5 USERS *** +DG1/racdb/datafile/users.262.713375891
6 3 TS1 *** +DG1/racdb/datafile/ts1.450.713706851-----moving this file to other diskgroup 'FRA'
List of Temporary Files
=======================
File Size(MB) Tablespace Maxsize(MB) Tempfile Name
---- -------- -------------------- ----------- --------------------
1 29 TEMP 32767 +DG1/racdb/tempfile/temp.264.708103309
1) Connect to rman and copy the datafile .
Here i am moving the datafile 6 from diskgroup DG1 to diskgroup FRA
RMAN> copy datafile 6 to '+FRA';
Starting backup at 15-MAR-10
allocated channel: ORA_DISK_1
channel ORA_DISK_1: sid=121 instance=RACDB1 devtype=DISK
channel ORA_DISK_1: starting datafile copy
input datafile fno=00006 name=+DG1/racdb/datafile/ts1.450.713706851
output filename=+FRA/racdb/datafile/ts1.257.713707167 tag=TAG20100315T115925 recid=13 stamp=713707167
channel ORA_DISK_1: datafile copy complete, elapsed time: 00:00:03
Finished backup at 15-MAR-10
Starting Control File and SPFILE Autobackup at 15-MAR-10
piece handle=/u01/app/oracle/rman/cont_auto_c-705719985-20100315-04 comment=NONE
Finished Control File and SPFILE Autobackup at 15-MAR-10
2) Take the datafile which you want to move to offline state
RMAN> sql "alter database datafile 6 offline";
3) Switch the datafile to copy; It is same as issuing "alter database rename file statement"
RMAN> switch datafile 6 to copy;
datafile 6 switched to datafile copy "+FRA/racdb/datafile/ts1.257.713707167"
4) Recover the datafile 6
RMAN> recover datafile 6;
Starting recover at 15-MAR-10
using channel ORA_DISK_1
starting media recovery
media recovery complete, elapsed time: 00:00:04
Finished recover at 15-MAR-10
5) Online the datafile 6
RMAN> sql "alter database datafile 6 online";
RMAN> report schema;
Report of database schema
List of Permanent Datafiles
===========================
File Size(MB) Tablespace RB segs Datafile Name
---- -------- -------------------- ------- ------------------------
1 480 SYSTEM *** +DG1/racdb/datafile/system.261.713375891
2 200 UNDOTBS1 *** +DG1/racdb/datafile/undotbs1.516.713375845
3 620 SYSAUX *** +DG1/racdb/datafile/sysaux.517.713375779
4 200 UNDOTBS2 *** +DG1/racdb/datafile/undotbs2.515.713375845
5 5 USERS *** +DG1/racdb/datafile/users.262.713375891
6 3 TS1 *** +FRA/racdb/datafile/ts1.257.713707167 ----moved from '+DG1' to '+FRA' diskgroup.
List of Temporary Files
=======================
File Size(MB) Tablespace Maxsize(MB) Tempfile Name
---- -------- -------------------- ----------- --------------------
1 29 TEMP 32767 +DG1/racdb/tempfile/temp.264.708103309
Thursday, March 11, 2010
Installing Oracle 11g R2 Grid Infrastructure
Steps for installing 11g R2 grid infrastructure
I have installed 11g R2 grid infrastructure for cluster on OEL 5 using vmware server 2.0.
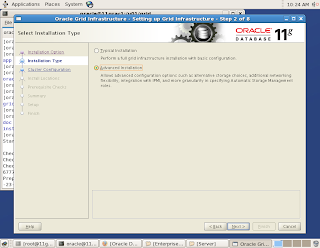
1) Here i am going with grid infrastructure for cluster

2) Going with advanced installation
3) Select the language

4) SCAN - Single Client Access Name
Oracle 11g R2 introduced new concept called Single Client Access Name (SCAN).
It eliminates the need to change TNS Entry when nodes are added to or removed from the Cluster and also creates the location independence for the clients.
Here i am adding a scan vip entry in the /etc/hosts file. This vip should not be accessible
SCAN IP, VIP and PUBLIC IP should be on the same subnet.

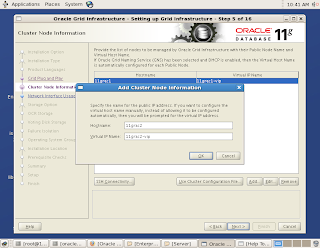
5) Here since we are not going with GNS for the vip, so manually feeding the vip info for both the nodes.

6) Here ssh is checking for the connectivity.

7) Providing the interfaces for public and private ip

8) From 11g R2 we don't have the option of going with raw devices or OCFS for OCR and VD. We have to use either ASM diskgroup or some clustered file system

9) Creating diskgroup for keeping OCR and Voting Disk


Selecting all the 3 disks for the diskgroup

10) Setting the password

11)

12)Created 3 OS groups and assinging groups for os authentication to ASM

13)Providing the orainventory location and location for grid installation

14) Checking for pre-reqs

Due to insufficient memory it is throwing messages, but ignoring those messages and proceeding. The minimum memory required for 11g R2 is 1.5G


15) After the binaries are installed on to both the nodes it will propmt you to execute 2 scripts
a)oranstRoot.sh
b)root.sh
Execute both scripts on each node one after the other.
After executing the remaining configuration installations will be done.

After this the installation of grid infrastructure is completed.
I have installed 11g R2 grid infrastructure for cluster on OEL 5 using vmware server 2.0.
1) Here i am going with grid infrastructure for cluster

2) Going with advanced installation


Oracle 11g R2 introduced new concept called Single Client Access Name (SCAN).
It eliminates the need to change TNS Entry when nodes are added to or removed from the Cluster and also creates the location independence for the clients.
Here i am adding a scan vip entry in the /etc/hosts file. This vip should not be accessible
SCAN IP, VIP and PUBLIC IP should be on the same subnet.


a)oranstRoot.sh
b)root.sh
Execute both scripts on each node one after the other.
After executing the remaining configuration installations will be done.

After this the installation of grid infrastructure is completed.
Monday, January 11, 2010
How to Change Public IP,Private IP and VIP in Oracle 10g RAC on Linux
Changing the IP at OS level without updating the oracle cluster will crash the cluster.
Hence below are steps which provides the process of changing the IP on Cluster nodes.
Here i am using 2 node cluster on RHEL AS-4.
1) Shut down all the services like database,ASM,nodeapps on the both the nodes.
Here in my case only cluster services are running

2)Change the Public IP and Private IPin clusterware. Fire the statement from the node from which you have installed clusterware.
Here my previous IP was 172.26.0.0 series and i am changing it to 172.25.0.0 series

3) Change the Virtual IP
Change the VIP as it needs to be in the same subnet as of Public IP
My VIP was 172.26.16.61 on node2 and i am changing it to 172.25.16.61. Similarly for node1


4) Shut down the cluster on all nodes
node1 #]crsctl stop crs
node2 #]crsctl stop crs
5) Now change the IP at OS level and change the /etc/hosts file on both nodes
Changing from 172.26.0.0 series to 172.25.0.0 series.

6) After performing all the above steps reboot both the nodes.
Hence below are steps which provides the process of changing the IP on Cluster nodes.
Here i am using 2 node cluster on RHEL AS-4.
1) Shut down all the services like database,ASM,nodeapps on the both the nodes.
Here in my case only cluster services are running
2)Change the Public IP and Private IPin clusterware. Fire the statement from the node from which you have installed clusterware.
Here my previous IP was 172.26.0.0 series and i am changing it to 172.25.0.0 series
3) Change the Virtual IP
Change the VIP as it needs to be in the same subnet as of Public IP
My VIP was 172.26.16.61 on node2 and i am changing it to 172.25.16.61. Similarly for node1
4) Shut down the cluster on all nodes
node1 #]crsctl stop crs
node2 #]crsctl stop crs
5) Now change the IP at OS level and change the /etc/hosts file on both nodes
Changing from 172.26.0.0 series to 172.25.0.0 series.
6) After performing all the above steps reboot both the nodes.
Tuesday, January 5, 2010
Find the patches applied to your database
SQL> select ACTION_TIME,ACTION,VERSION,ID,COMMENTS from registry$history;
ACTION_TIME ACTION VERSION ID COMMENTS
-------------------- -------------- ---------- ---------- --------------------
13-NOV-09 05.54.51.9 UPGRADE 10.2.0.4.0 Upgraded from 10.2.0
01116 PM .1.0
The above query will display the series of upgrades/downgrades done on your database.
(OR)
$ORACLE_HOME/OPatch/opatch lsinventory
Modifying the default gateway address used by the Oracle 10g VIP
By default, the server's default gateway is used as a ping target during the Oracle RAC 10g VIP status check action. Upon a ping failure, Oracle will decide that the current interface where the VIP is running has failed, and will initiate an interface / internode VIP failover.
Though the VIP check action will work as designed in most situations, it will not function
correctly as designed under special circumstances where the server's default gateway resides on
a different network from the client LAN network (the network where the VIP is configured on).
In order for the VIP check action to function as designed, the ping target address needs to be
modified after installing RAC 10g.
o Example of a network configuration where use of the default gateway is sufficient
 Since the VIP, clients and default gateway are all on the same network segment, the VIP
check action will function correctly in the above case.
o Example of a network configuration where the ping target needs to be modified
 Since the default gateway is configured on a different network segment from the VIP/Clients,the VIP check action will not work correctly as designed in the above configuration.
Since the VIP check action will use the default gateway (192.168.1.1) as the ping target,and Oracle will not be able to detect failures in the client network (146.56.20.X) as expected.
In this case, the ping target used by the VIP needs to be modified to an IP address in the 146.56.20.X network segment in order for the check action to function correctly as designed.
The target address needs to remain static and highly available, as VIP availability directly leads to service / instance availability. In order to achieve high availability for the ping target, make sure to use redundant links / hardware for the host / router to be used as the target.
Modifying the ping target for the Oracle 10g VIP
----------------------------------------------------------
The following steps need to be performed on every node within the cluster.
1. Stop all node applications.
% srvctl stop instance -d-i
% srvctl stop asm -n
% srvctl stop nodeapps -n
2. As root, modify the following script and change the value of DEFAULTGW variable.
# vi $ORA_CRS_HOME/bin/racgvip
* Examples of modifying the ping target
BEFORE)
DEFAULTGW=
AFTER)
DEFAULTGW=146.56.20.1
3. Start the node applications and other necessary resources.
% srvctl start nodeapps -n
% srvctl start asm -n
% srvctl start instance -d-i
Make sure to repeat these steps for all CRS homes within the cluster.
References: Metalink
Though the VIP check action will work as designed in most situations, it will not function
correctly as designed under special circumstances where the server's default gateway resides on
a different network from the client LAN network (the network where the VIP is configured on).
In order for the VIP check action to function as designed, the ping target address needs to be
modified after installing RAC 10g.
o Example of a network configuration where use of the default gateway is sufficient
 Since the VIP, clients and default gateway are all on the same network segment, the VIP
check action will function correctly in the above case.
o Example of a network configuration where the ping target needs to be modified
 Since the default gateway is configured on a different network segment from the VIP/Clients,the VIP check action will not work correctly as designed in the above configuration.
Since the VIP check action will use the default gateway (192.168.1.1) as the ping target,and Oracle will not be able to detect failures in the client network (146.56.20.X) as expected.
In this case, the ping target used by the VIP needs to be modified to an IP address in the 146.56.20.X network segment in order for the check action to function correctly as designed.
The target address needs to remain static and highly available, as VIP availability directly leads to service / instance availability. In order to achieve high availability for the ping target, make sure to use redundant links / hardware for the host / router to be used as the target.
Modifying the ping target for the Oracle 10g VIP
----------------------------------------------------------
The following steps need to be performed on every node within the cluster.
1. Stop all node applications.
% srvctl stop instance -d
% srvctl stop asm -n
% srvctl stop nodeapps -n
2. As root, modify the following script and change the value of DEFAULTGW variable.
# vi $ORA_CRS_HOME/bin/racgvip
* Examples of modifying the ping target
BEFORE)
DEFAULTGW=
AFTER)
DEFAULTGW=146.56.20.1
3. Start the node applications and other necessary resources.
% srvctl start nodeapps -n
% srvctl start asm -n
% srvctl start instance -d
Make sure to repeat these steps for all CRS homes within the cluster.
References: Metalink
Subscribe to:
Posts (Atom)